Physical Address
304 North Cardinal St.
Dorchester Center, MA 02124
Physical Address
304 North Cardinal St.
Dorchester Center, MA 02124
Finding ticks while camping requires immediate action using proper removal techniques that most outdoor enthusiasts get dangerously wrong.
Did you know that over 300,000 Americans contract Lyme disease annually, with most cases occurring during peak camping season? When you’re miles from the nearest hospital, knowing how to properly remove a tick can mean the difference between a minor inconvenience and a serious health crisis. You can’t afford to panic or use outdated removal methods that actually increase your risk of infection. The right technique involves specific tools and precise steps that most campers don’t know about.
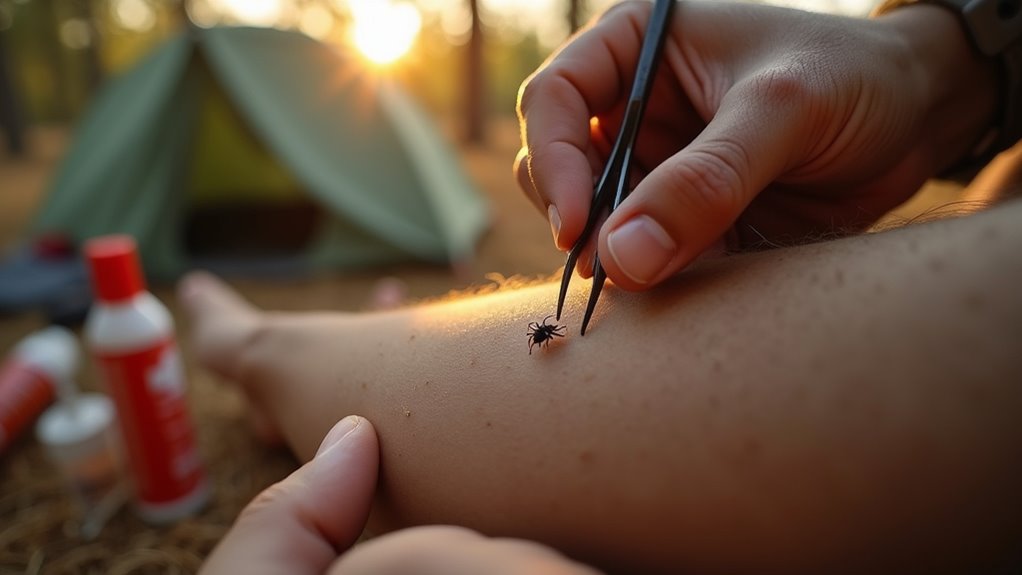
While you can’t predict when you’ll encounter ticks during your camping adventure, you can definitely prepare for safe removal by packing the right tools. Fine-tipped tweezers are your most essential item—they’ll give you the precision needed to grasp ticks close to your skin.
Pack fine-tipped tweezers for your camping trip—they’re essential for precise, safe tick removal when you’re far from medical help.
Pack rubbing alcohol or antiseptic wipes to disinfect the bite area and your tweezers. A small magnifying glass helps you spot tiny ticks, especially in low-light camping conditions.
Include adhesive tape to dispose of removed ticks safely. Don’t forget a small flashlight or headlamp for better visibility during removal.
These lightweight tools take up minimal pack space but provide maximum peace of mind when you’re miles from medical facilities. Experienced true campers know that proper tick removal technique is just as crucial as having the right equipment.
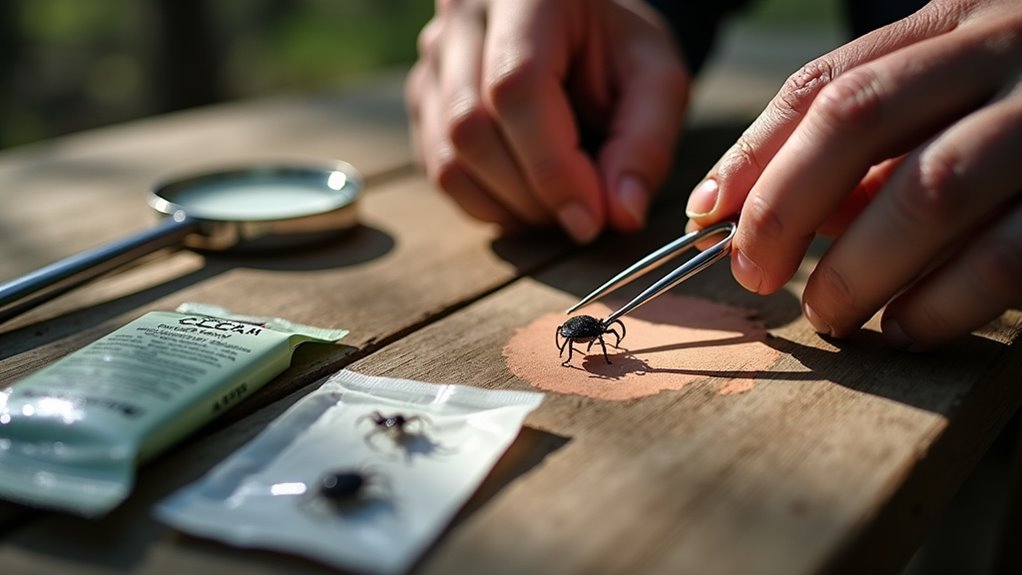
Once you’ve gathered your tick removal tools, it’s time to put them to work with a methodical approach that’ll keep you safe in the backcountry. Stay calm and work deliberately – rushed movements increase your risk of leaving tick parts embedded in your skin.
Here’s your extraction process:
Save the tick in a sealed container with the date and location noted. You’ll want this information if symptoms develop later. Prevention remains the best strategy, so always apply insect repellent containing DEET before heading into tick-prone areas during future camping trips.
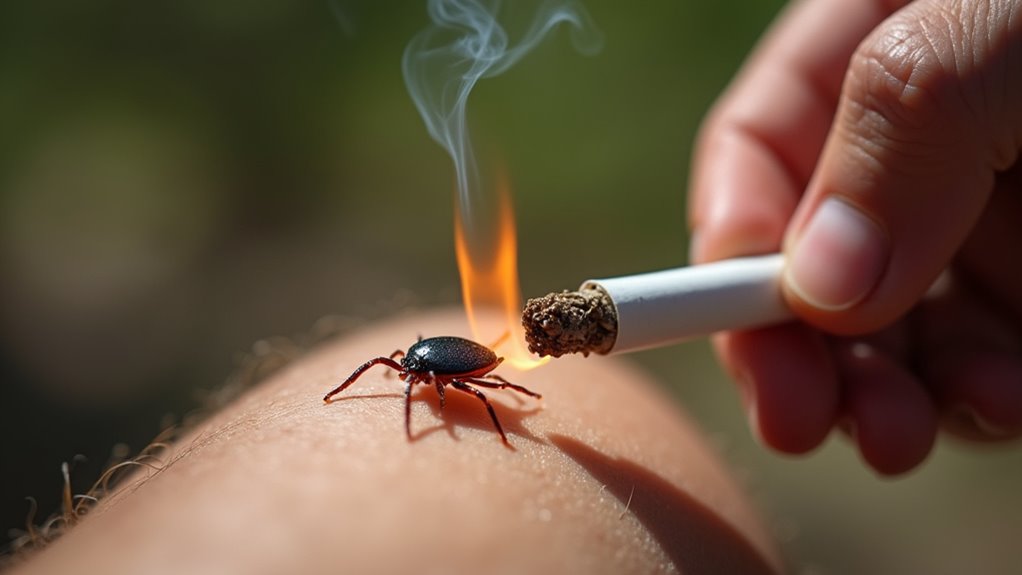
Despite the urge to act quickly, certain removal methods you’ve probably heard about will actually make your situation worse. Don’t apply heat from matches, cigarettes, or hot needles—this can cause the tick to release more saliva and bacteria into your bloodstream.
Avoid using petroleum jelly, nail polish, or rubbing alcohol directly on the tick, as these substances won’t make it detach and may stress it into releasing harmful fluids.
Never squeeze the tick’s body with your fingers or twist it during removal. Don’t use your fingernails to grab it either.
Resist the temptation to quickly yank the tick out, as this often leaves the head embedded in your skin.
These folk remedies might seem logical, but they’ll increase your risk of infection and disease transmission considerably.
After removing any ticks, make sure you have access to camping showers or other cleaning methods to thoroughly wash the affected area and your hands.
Since different tick species carry various diseases, you’ll want to identify what type has attached to you during your camping trip. Quick identification helps determine your risk level and whether you need medical attention.
Here are three common ticks you’ll encounter while camping:
Don’t panic if you can’t immediately identify the species. Focus on proper removal first, then research the tick type using photos or consult a healthcare provider. Tick encounters become more frequent during hot weather camping when increased outdoor activity and lighter clothing provide easier access for these parasites.
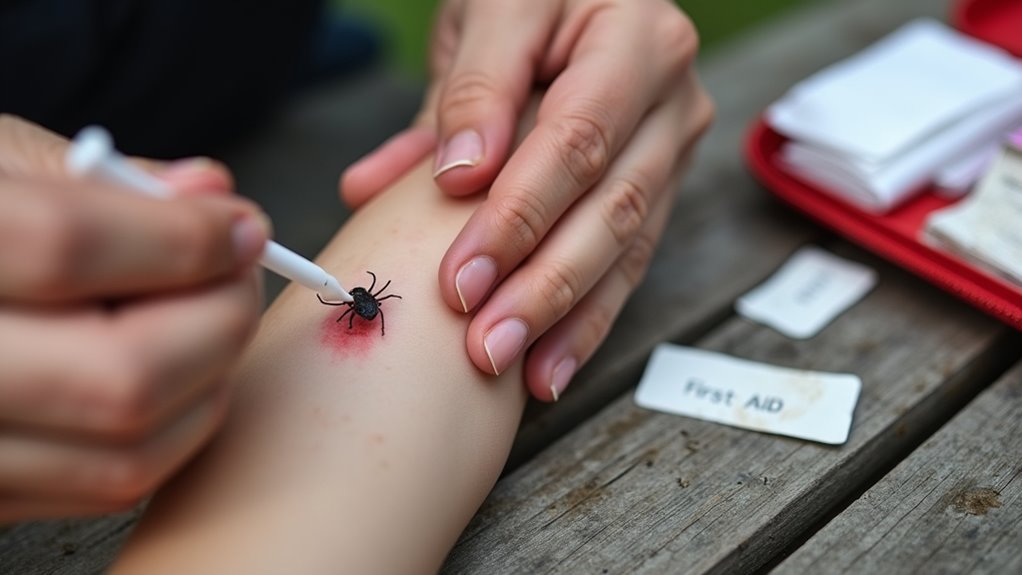
After you’ve successfully removed the tick, proper wound care becomes your next priority to prevent infection and promote healing. Clean the bite area thoroughly with rubbing alcohol or soap and warm water.
Apply a small amount of antibiotic ointment if you have it in your first aid kit, then cover with a bandage.
Monitor the site closely for the next few weeks. Watch for expanding redness, rash patterns, or unusual symptoms like fever, headache, or joint pain. These could indicate tick-borne illness requiring medical attention.
Keep the wound clean and dry while camping. Change bandages regularly, especially if they become wet or dirty. Don’t scratch the bite site, as this increases infection risk.
Take photos of any developing rashes to show healthcare providers later.
Consider saving the removed tick in a sealed container or plastic bag, as this can help with tick identification if symptoms develop later.
While most tick bites don’t result in illness, you’ll want to stay alert for specific symptoms that can develop days or weeks after your camping trip. Monitor yourself carefully for early warning signs that shouldn’t be ignored.
Watch for these key indicators of tick-borne disease:
Don’t dismiss these symptoms as simple fatigue from camping. Contact your healthcare provider immediately if you experience any combination of these signs. Early treatment markedly improves outcomes for most tick-borne illnesses.
These precautions are especially important when hiking popular trails like Scotland’s West Highland Way, where tick exposure can occur in highland environments.

Though you can’t eliminate every tick encounter in the wilderness, you can dramatically reduce your risk with smart preparation and proven techniques.
Treat your clothing and gear with permethrin before heading out—it’ll repel ticks for weeks through multiple washes.
Choose light-colored clothing so you’ll spot ticks easily, and tuck pants into socks to create barriers.
Apply DEET-based repellent to exposed skin, focusing on ankles and wrists.
Stay on marked trails whenever possible, avoiding tall grass and dense brush where ticks wait.
Set up camp in sunny, dry areas rather than shaded, humid spots.
Perform tick checks every few hours, not just at day’s end.
Check your gear too—ticks often hitchhike on backpacks and sleeping bags before finding their way to you.
Keep your camping utensils and cooking equipment stored in sealed containers or bags to prevent ticks from hiding in the crevices and being transferred to your food preparation area.
You’ve now got the knowledge to handle tick encounters confidently during your outdoor adventures. Remember, the CDC reports that over 50,000 Americans contract tick-borne diseases annually – but don’t let that statistic scare you away from nature. With proper removal techniques, post-care vigilance, and smart prevention strategies, you’re well-equipped to enjoy camping safely. Stay alert, check regularly, and trust your instincts. The wilderness is calling, and you’re ready to answer responsibly.